Tuesday, November 27, 2012

2nd Bedroom - Part 14: Built-in Cabinet

It's taken more than two months, but I have finally finished the built-in cabinet in the second bedroom.  Having a newborn competing for all my time has left little time for house work, but I've managed a few moments here and there.

The big open cavity in the wall was a nice place to dump my tools during the remodel of the bedroom.  One of the first things I had to do was clean out all of my tools!  Then I built some 2x4 supports for the future cabinet and nailed them to the floor.

As you may recall from a previous post, I built a 3D model of the cabinet (in SketchUp).  This model helped answer several questions during the design phase (especially about the size and number of the doors and drawers).


Having the 3D model also allowed me to get an accurate count of all the parts I needed and even do a yield study to determine how much material I would need to buy.

After figuring out how I would build the cabinet myself, I decided to do some drawings (see sample below) and get some quotes from a couple of different cabinet shops to see if it might not be worth it to have someone else fabricate the parts for me.  Materials would have cost me about $180.  The prices I got back were $500 and $800 (including materials).  I wasn't willing to pay those prices, but I still didn't want to fabricate the parts myself if I didn't have to.

I used to work for Waston Furniture Group as a product designer before becoming a full time stay-at-home dad.  I decided to see if my former coworkers might not grace me with a small favor.  They were, in fact, willing to do the fabrication!  I sent over my drawings and DXF files (for CNC programming).

Many, many thanks to them for their help!

Having such accurate parts with pilot holes made assembly so much easier and less time consuming (this is important since I now have a wee baby to care for as well as a three-year-old).

I used two Wolfcraft 90° clamps to hold the panels together while I screwed them together.  I also had two spacers fabricated so that the drawer cavity separator panels could be assembled more accurately.  I decided to use screws for everything because you can't see the fasteners since this is a built-in cabinet.

Getting the assembled cabinet into the wall cavity was both harder and easier than I expected.  Harder because the amount of room I left myself to work with was very small.  Easier because I  leveled the supports pretty accurately and the sit of the cabinet left it very square.

I used very inexpensive bottom mount drawer slides.  Bottom mounting allowed me to not have to worry about pilot holes on the drawer bodies.  I also built the drawers such that the drawer bodies and drawer faces were independent of one another.  This made the next steps much easier.

I used half overlay European hinges for the cabinet doors.  After installing all the drawers, drawer faces, and doors I carefully aligned them all so that there was 1/16th of an inch between them.

This was important because it allowed me to use the drawers and doors to space off of to install the trim (I spaced the trim 3/32nds from the drawers/doors).

Then I pulled off all the carefully aligned doors and drawers, masked, and painted the trim.  And I painted the drawer faces and doors.  I had to use two layers of primer because the MDF sucked up so much of the primer.  I also applied two layers of paint on top of the primer so as to get an even application.  I used Mythic brand paint which has a very low VOC.  My three-year-old even helped me sand and paint the drawers/doors!

After reinstalling the doors and drawer faces and aligning them all over again... I was done!

Here are some detail shots.


My three-year-old moved his stuff into the cabinet before it was done.  And now that it's complete he loves to climb inside the closet upper!  The closet will be perfect for his little clothes.  And as his clothes get bigger, the upper closet shelf can be removed and the hanger bar can be moved up twelve inches.

Room remodel done.  Whew!  This is now the nicest and most complete room in the house.

Thursday, October 04, 2012

Attic Access

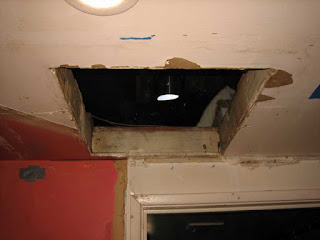
I finally screwed a piece of plywood over the attic access hole in the ceiling.  There's been a thick sheet of plastic over the hole for years and I figure the plywood (with some weather stripping) can only improve the thermal insulation.


Tuesday, October 02, 2012

Ceiling Fan

I installed a ceiling fan in the master bedroom over the last couple of days. The goal is to move more air around the room in the winter to equalize the temperature (on the floor) and hopefully get less mold growth. The three-year-old wanted to come up into the attic space, but I had to tell him no.  He likes the ceiling fan... especially turning it on and off via the pull chain.


The area above the ceiling fan has between 18 and 24 inches of space to work in. It was very cramped. I tied into the electrical at the point where I had worked on the bathroom heater (so that was kind of easy).

Friday, September 28, 2012

Shoveling in the Alley

Since I'm going to build a fence this winter I thought I'd clean up a bit along the fence line.  I filled up two yard waste containers and three yard waste bags.  The cedar droppings had been building up since at least when we bought the house.  The bottom layer was composting nicely, too.  The roots of the cedars were even finding their way into the mulch.  This actually made shoveling kind of hard since I had to use the pruners to cut the roots.  I suspect that digging the post holes is going to suck because of all the roots, too.  Oh, well.

I probably won't take down the old crappy fence until I'm ready to run the string line to establish the property line.  But I'm really looking forward to taking down the crappy old fence.

Sunday, September 09, 2012

Hall Bath Work

We've burned out two little floor heaters in our hall bathroom over the last six plus years.  And we've never even tried to turn on the existing wall heater that's in there (You can see for yourselves why).  We'd purchased a replacement wall heater a while ago but never installed it.  Since winter is approaching, we decided to install it.  And we decided to connect the light in the venting fan to power as well.

Here are photos of the heater before, during and after.  The new heater is a little bit smaller so I just filled the gaps with Gorilla tape.  The wall is going to be removed (hopefully soon) to make room for a nook that will house the new sink... so doing wall repair and rebuilding just isn't energy well spent.

The light switch/outlet got replaced by a GFCI and double toggle switch.  The existing light in the bathroom will remain and have the fan light tied into it so they'll both turn on when the top switch is on.  The bottom switch will control the night light that's in the fan fixture.

Here are some photos of the other side of the wall.  I'm going to take some drywall remnants and close it all up.

But we're going to keep the hall access open for now so that we can use the space as additional storage.  Yay, storage!

I also finally connected the second bedroom heater to the service panel. And... yes, it works!

Tuesday, September 04, 2012

2nd Bedroom - Part 13: Painted Trim

I've filled all the nail holes, sanded, and painted the trim.  I've also installed a curtain rod and hung some curtains.  The room feels very nice now.


The only thing left to do is built the built-in closet cabinet, install it, trim around it, and then paint the closet trim and doors.  I'm hoping to do that later this week or next week.

Monday, September 03, 2012

Bedroom Improvements

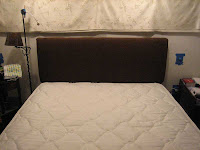
We made a a few bedroom improvements over the weekend.  We built and upholstered a headboard.  We used 1x4's 2x4's, screws, 2" thick foam, upholstery fabric, and staples.  It's not perfect, but it's nice enough.  And it keeps up off the cold exterior wall.

We also installed a footboard.  It's a little narrower than the bed so as to help keep us from bashing our shins on the corners.

We also removed the closet doors and hung some curtains.  We got the curtains at Ikea (they're pretty nice!).  The curtains are an attempt to increase the airflow into the closets so as to reduce mold growth on the walls.

We cleaned the entire room with white vinegar to remove as much mold and mildew as possible.  We wiped down the floor, the walls, and the furniture.  The bottom foot of the walls tend to grow some mold because of the temperature and humidity during the winter.  We're also going to look into using an air filter fan to help circulate more air from the top of the room to the floor.

Monday, July 09, 2012

2nd Bedroom - Part 12: Trim

I was able to finish the trim in the second bedroom this weekend.  I took my time with the window and even sprayed insulating foam in all the cracks before installing the trim around it.  I also fussed with the door frame and smoothed the closing action.

All the trim is MDF except for the window sill.  I used wood (hemlock) because the MDF window sills I've seen don't age well.  Plus the profile that I used under the sill is only available in wood (hemlock).


Now all I have to do is fill the nail holes and paint the trim.  That... and... build the built-in closet cabinet, install it, and install trim around it.

If you're interested in seeing what a three-year-old does in a mostly empty room... click here.

Friday, July 06, 2012

2nd Bedroom - Part 11: Floor

I almost forgot to blog about the floor! I had to install the floor before the last coat of wall paint because I needed a place for my brother-in-law to sleep while he visited.  I pulled up the old carpet and began scraping up the tiles.  It proved much harder than the first tiles I pulled up.  So much so that I gave up.  This is as far as I got.

I just didn't have the time or energy to pull up all the tiles before company arrived so I slapped down the Ikea flooring.  It's pretty forgiving with little floor variations (though they won't tell you that).

The three-year-old was very excited to be able to walk around in his room!  He immediately turned circles in the middle of his [empty] room.

Then I filled the room with a lot of his stuff so that living room wasn't so full of his stuff.  Nicer for company.  And the three-year-old liked it, too.

Wednesday, July 04, 2012

2nd Bedroom - Part 10: Paint

I was able to finish painting last weekend.  Over the course of a week or so I was able to put on a layer of primer (ceiling and walls), a thick coat of flat white on the ceiling, and two layers of semi-gloss pastel blue on the walls.  The first coat on the walls was a little splotchy because the paint looked white when it was wet and didn't turn blue until it dried.  Painting white on white is hard (the primer was white).  I may go back and touch up a couple of spots along the ceiling corners, but I might not.


I spent today (July 4th) installing trim.  I did the trim around the door and the base molding.  I'll do the window this weekend.

Tuesday, June 19, 2012

2nd Bedroom - Part 9: Mudding

I've been grabbing some time in the evenings (after the almost-three-year-old goes to sleep) to mud and sand the walls in the second bedroom.  The screw holes and the wall corners were pretty easy.  The intersection between the ceiling and the walls was more tricky and required some significant feathering.  The reason for that is that there is a layer of cloth adhered to the ceiling to cover the panel seams.  Since I didn't replace the ceiling drywall and didn't want to even think about touching the fabric, I had to build up a little joint compound on the ceiling corners to get over the lip of the fabric (it didn't go to the edge because of the crown molding).  After about three coats of joint compound and a lot of sanding, I am done.  Or as done as I can be and want to be.

If only I wasn't so obsessive compulsive and fixated on having smooth walls.  It would be so much easier to just tape and mud the joints and then throw some texture on the walls.  But I really hate textured walls.  Maybe hate is too strong a word.  But since their my walls, I guess I get to have them the way I want them.


Thursday, June 07, 2012

More May Flowers

Here are some more photos of flowers in the backyard. 

Buttercup

A weed or a volunteer.

A smelly weed.

Clover.

Tristar Everbearing Strawberry

Foxglove