Tuesday, October 03, 2017

West Side Deck

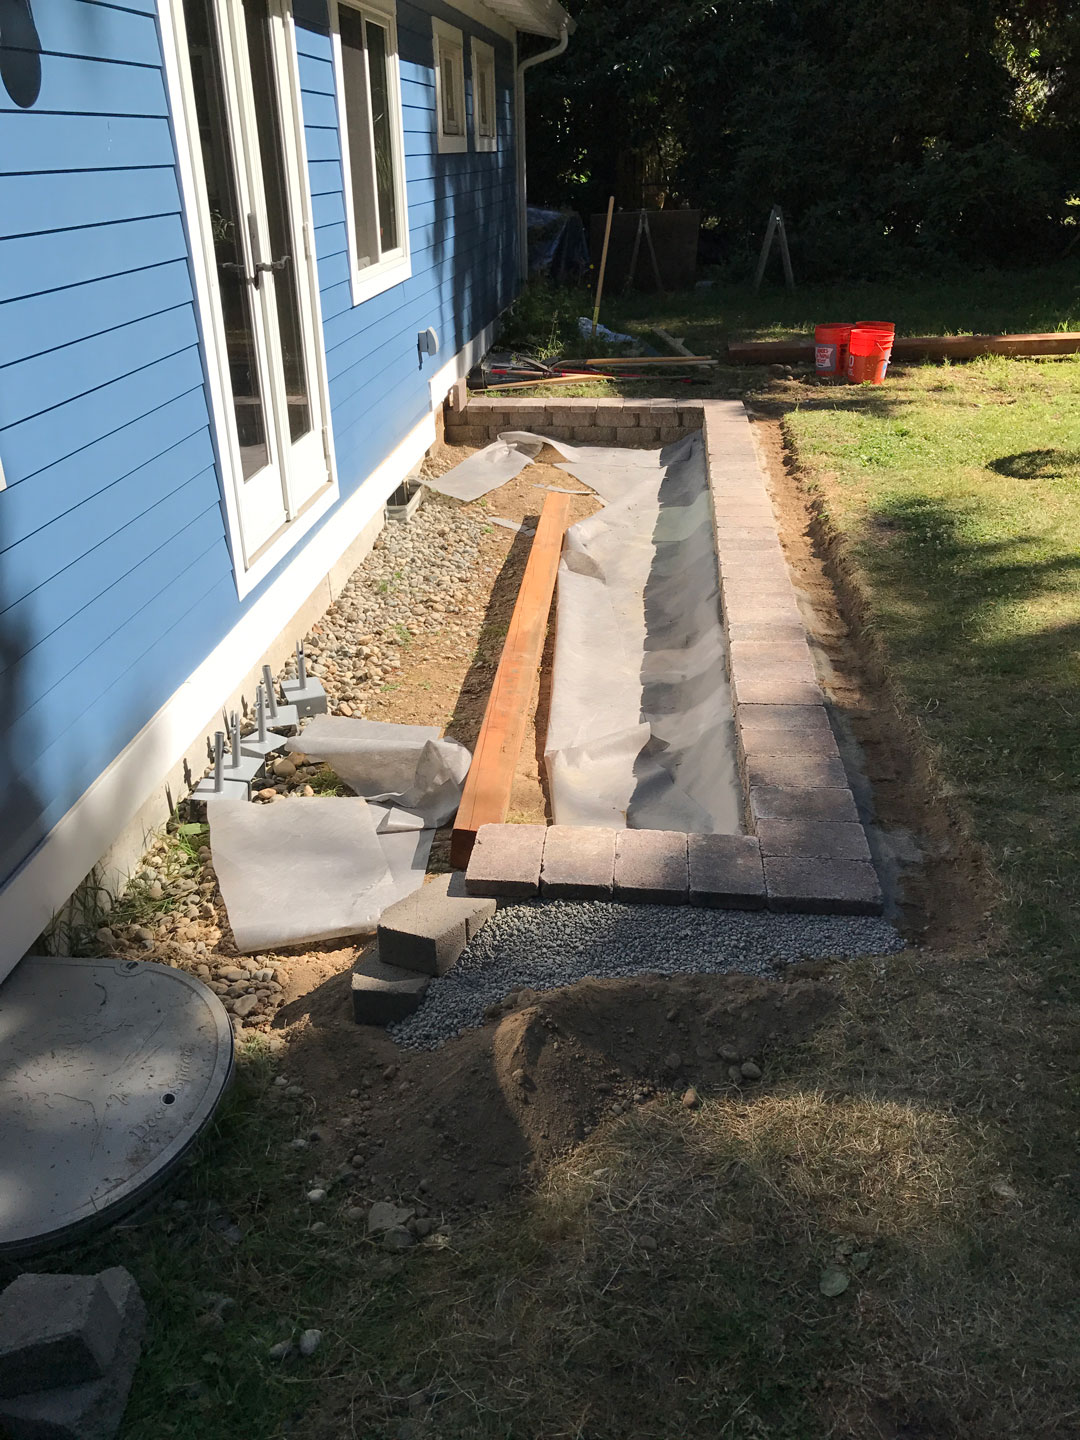
We built a little deck on the west side of the house to transition from the house to the lawn because the elevation of the lawn is too high to be brought directly up to the house. The deck is 6' deep by 19' wide and is made of 1" thick smooth planed cedar planks that have been stained/sealed with a deck product from Daly's. We're really happy with our new deck! It might eventually get a hot tub.

We dug out an area on the west side of the house and built a small retaining wall.

Then we installed a beam right next to the wall and a ledger on the house.

Next, we installed the joists as well as two layers of 2x4's on top of that. We did this so that we could mount the ledger lower on the house where the fascia was because we didn't want to have to remove siding (which we would have had to do if we mounted the ledger higher. The additional 2x4 layers brought the deck up to its finish height and allowed for a floating effect.

Here's the deck after it has been stained/sealed, but before the final fascia wrap.

It rained.

Here's the deck stain after a couple of days.

Here's the deck with the final fascia wrap. The step is freestanding and can be moved if necessary (i.e. for lawn mowing).

We also added some door stops/catches. These will save the siding from getting hit by the door handles on the French doors.

Thursday, August 17, 2017

Entryway Lights

Here is the entryway light.

 Here are the entryway closet lights. I had to us goof rings around the cans because the holes I originally cut in the drywall were just a little bit too big.

Hedge Trim

I bought a hedge trimmer and my sister-in-law trimmed the hedge. Now my in-laws can park their car a little more easily.

Caulking the Corners

The contractor who built the additions uses a technique that he shared with me. He adds a small bead of caulk in the corners of the drywall before he paints to minimize the possibility of cracks in the future. I decided to try this technique out in the entryway. 

Thursday, July 27, 2017

Saturday, June 03, 2017

New Kitchen Doorway Framing

The kitchen doorway was reframed and moved slightly. This allowed for the last of the drywall to be hung. We found a sketch of the old/original kitchen layout as well. Neat!

Thursday, May 18, 2017

Entryway Drywall

We hung the wall board in the entryway back in April.

I took some photos of wire locations in case I every need to know in the future where wires are.
Now to mud the room.

Friday, April 14, 2017

Door Trim Paint

My sister-in-law painted the door trim in the multi-purpose room exterior French doors and the guest bedroom door trim.

Entryway Insulation

My brother-in-law installed some insulation on the interior wall between the room he lives in and the entryway room.

Window Blind

I installed a window blind on the window in the multi-purpose room (playroom). It was a pretty easy install. The blind that we chose was just an off the shelf blind from Home Depot that was cut to fit. The depth of the blind is 2.5" which is nice since that means there's more space between the slats when they are open.

Monday, January 30, 2017

Kitchen Exhaust Fan

I made an attempt to install a new kitchen exhaust fan. The old one still works but no longer has a way to vent outside since we put on the new siding. I bought a new exhaust hood that said I could use the fan as an in-line fan (meaning I could take it out of the hood). I wanted to do this so that I didn't have to tear out the cabinets about the stove.

Here is the new blower fan in the new hood.

Here is the location of the old fan. It's pretty disgusting.

Here's the old fan. It still works, but I don't really want to use it. It's pretty foul.

Turns out that the range hood that I bought can't have the fan taken out (at least not easily). So I bought a cheap in-line fan and install some new ducting. The results are not that great. The draw is very weak. The weak draw could be due to the fan, but I suspect that it's because of the flexible ducting that I used. There is just too much texture to allow for an efficient flow. There are also two ninety degree turns.

Oh, well. I'll fix it when I move the stove to the new location.

I did make an interesting find. When I scraped away the insulation from the spot where I cut a hole in the ceiling I found an old box of chocolates. I got really excited, but it turned out to be empty. I suspect that the old timers used this box to store cash (but who knows).

Saturday, January 21, 2017

New Outlet in Kitchen

We've had a single outlet (with a switch for an under cabinet light). The light failed a long time ago and I've never been able to fix it. I finally got tired enough of only having one outlet so I installed a new grounded duplex. It was super easy. I used a 20 amp outlet since I will eventually be rewiring the kitchen with 20 amp outlets everywhere. It's so nice having two outlets!

20 Amp Switch

I installed a 20 amp switch on the exterior outlet that I installed on the north side of the house. The switch came with no ground screw. I figured it was a manufacturing defect so I ordered another one. The replacement was the same. I called the hardware store and they said that most states don't require ground screws on 20 amp light switches (Washington is such a state). Good to know!

Sunday, January 15, 2017

Entryway Electrical

I completed installing all the electrical that is related to the entryway. This includes the doorbell (which is low voltage), the switches for all the lights, and the switched exterior outlet. I also finished framing around the service panel. I did all of the electrical in order to have a cover inspection done. The inspector spent thirty seconds looking at the area and five minutes chatting with me about various topics. I had been sweating the inspection and made sure everything was perfect because the previous inspector had been kind of freaked out, rude, and generally not helpful. The new inspector mentioned that the other inspector was new and kind of uptight. I had requested that the first inspector not come back when requesting my inspection. Needless to say, I passed the inspection.

Here's the doorbell before I wired it.

Here's the doorbell after I wired it. The light stays on all the time.

Here's the 16v transformer in the attic space for the doorbell. It attaches to a junction box.

Here are all the wires coming out of the service panel. I made them all look pretty so the inspector would be pleased.

Here all the wires for the light switches and doorbell.

I also cleaned up the wires in the attic space and labeled the junction boxes. 

I have to go under the house to wire the exterior outlet for the north side of the house. I was more difficult that I expected in some ways and easier in others. There is so little room down there!

Here's the 20 amp switched exterior GFCI outlet. I chose the side of the porch because it was easiest place to do the install. The location is also more protected from moisture and is also less visible.