Wednesday, September 23, 2015

Fence: Part 10 - Post Caps and Rail Caps

I finished installing the post caps and the rail caps on the front half of the fence. I drilled a single hole in the top of the post cap and counter sunk the screw. I may go back and fill the screw holes with some stainable caulk. My spouse and I really like the proportions of the post cap (it's 4.25" square), and they were only one dollar a piece (at Dunn Lumber). The only piece I have left to install is the fascia piece that sits below the rail cap (on the outside of the fence).

Thursday, September 17, 2015

Fence: Part 9 - Pickets

I got all the pickets installed on the front half of the fence back in August. It's nice to have the visual privacy.

Monday, July 06, 2015

Fence: Part 8 - Post Cuts

I spent a couple of hours cutting the posts to their finished height on the front half of the fence. I used my Japanese pull saw to make the cuts and a couple of 2x4 remnants clapped to the post as guides. I made nine cuts in all. I also applied a wood preservative to the tops of the posts to help reduce rot. 

Tuesday, May 12, 2015

Attack on Stump Hill

My kids and I have been leveling the old hill where the old locust tree stump is located. The hill dirt has some garbage mixed in as well as some ash. We've moved about 12 wheel barrows full of dirt so far. We've added the dirt (that has had most of the trash removed) to the west end of Mount Hill where the dirt from under the house has been put. The kids have really enjoyed shoveling and raking, especially the two-year-old.

We've been meaning to get around to leveling this hill since we bought the house. The raspberries have grown so close to the hill that I wanted to level it so that they didn't take root on it. It's also something fun to do with the kids.

Eye Bolt

I've added a couple of eye bolts to the posts at the end of the driveway. Now we have something to tie balloon strings to when we have a party. My neighbors can do this as well!

Maybe I'll add another eye bolt to the post on the south side of the driveway too. That way I can hang a rope to block the driveway if I need to.

Hedge Transplant Begins

I have finally begun transplanting the hedge plants (lonicera nitida) that are inside the fence. I'm moving them to the end of the driveway where the plants are small and stunted (mostly due to some high school kids stomping on them a few years ago). This will allow me to eventually finish the fence more easily and have a some nice sunny gardening space. The blueberry plants will likely be moved when the hedge plants are currently.

I'm having to trim back quite a bit of the bush before moving it because the bush branches have grown into one another's spaces. It's also good to trim a plant back when transplanting it so as to reduce the energy needs of the plant and therefore the stress level of the transplant. Or so I've read and seen in practice.

The plant on the very end of the run is tiny and was always a runt. I will likely just end up tossing it. The next one it is very big and healthy. This is the first plant that I'm going to move.

Here's the final location of the first plant. I've planted it so that it is more vertical than it was before. I hope it likes its new home. I've given it some compost and will give it more as well as some mulch (maybe bark chips).

Saturday, December 27, 2014

Bathroom - Toilet and Sink Install

I took Xmas day off from working on the bathroom.

I spent a little time the next day installing and painting the base board trim behind the toilet. I smeared some silicone along the base of the wall and on the floor behind the trim piece to create a better water-proof transition in case water gets on the floor. 

On the 27th I installed the new toilet and the old sink (which is just a place holder until I get the new sink and vanity designed and installed). Plus, I still have to paint (and finish mudding) that side of the bathroom.

The first thing I did was pop out the built in plug/cap on the closet flange.

Then I installed the wax ring and new seal called an hydro cap. It supposedly allows you to reseat the toilet multiple times and increases the life of the wax ring. It made the installation pretty easy.

Then I set the (Toto) toilet base and installed the tank. It was kind of nice to hook up the water and flush the toilet for the first time. It was also a little anxiety producing, but no water came squirting out from under the toilet when I flushed for the first time.. *whew*

I also installed the old sink since is sucks not to have a sink in a bathroom. It's really easy to pull out again (only 5 connections) when I get some more time to mud and paint.

My spouse is very happy to have a working toilet and sink in the hall bathroom again. I even installed a toilet paper roll holder. I think I get to go out for Ethiopian food soon. Yay!

Bathroom - Drain Lines

I spent Xmas Eve day installing all the new ABS drain lines for the hall bathroom sink and toilet. Then I tied into the old cast iron drain line. I had cut a section out of the old drain line on the 21st and capped the pipe until I could get back to the work.

Here is a photo of the 1 1/2" drain line with clean-out for the sink.

I used a couple of J-hangers to hold the sink drain pipe. Very handy things.

Here's a shot of the new vent pipe for the toilet. The vent pipe is 2" and it ties into the old 3" vent. The old 3" vent pipe connected to the old 4" cast iron vent pipe. I am not really looking forward to removing the old 4" vent pipe from inside the wall. It's really hard to cut. And heavy.

Here you can see the 4" clean-out, the sink drain pipe, and the 4" toilet drain pipe connecting into the new 4" drain pipe that connects into the old 4" cast iron drain pipe.

Monday, December 22, 2014

Bathroom Walls - Accent

I primed and painted the wall behind the toilet. I also installed the double towel bar that we bought almost eight years ago. We are currently debating whether we want to paint more of the bathroom blue or just leave the west wall blue. 

I'm going to install the base board trim along the blue wall and then install the toilet. I also have to connect the drain line for the toilet.

Saturday, December 20, 2014

Bathroom Walls - Mudding

I still have a little mudding and sanding to do, but the drywall is up and mudded. There was a small patch of ceiling that I had to patch and mud as well.


Saturday, November 29, 2014

Bathroom Floor - Grout

I grouted the floor this morning. I had intended to do it yesterday, but I didn't feel well (I have some post infection inflammation in my inner ear that is causing me to feel dizzy and nauseous from a cold). It only took about an hour and a half. The most time consuming part was the wiping and cleaning of the floor tiles after I squished the grout into the cracks. 

I used a premixed polyurethane grout called QuartzLock2. I picked the color Silver-Gray since we think that it will go nicely with a Carrara marble counter top that we intend to use for the vanity/sink. It's more than twice as expensive as regular grout, but it retains some flexibility over its life (reducing cracking) and is self-sealing (so I don't have to seal it after I grout). I thought the grouting was pretty easy all in all. The grout has a shelf life of two years so I'll get to keep the bucket (which has a little left over in it) to do any patching of my mistakes that I lose sleep over.

You have to install the grout using a special polyurethane trowel which is kind of soft. And the manufacturer suggests using a cleaner (like Windex) in the cleaning water when wiping the tile clean. You're only supposed to do small patches of grouting at a time since since you wouldn't be able to reach the areas to clean them otherwise. I did patches of about two square feet at a time.

My knees were a little sore when I was done. So was my back.

Thursday, November 27, 2014

Bathroom Floor - Tile

Happy Thanksgiving!

I installed the floor tile in the bathroom today. Doing the tile and grout this long weekend gives the floor enough time to set and cure so that the shower can be used on Monday morning.

The first thing I did was to cut and layout the tile sheets (I rented a tile saw from Home Depot). I lined the tile up along the center line from the sink to the toilet. Sadly, that line is not parallel to the tub. Oh, well. Next time I install a tub I'll make sure my old house walls are not only plumb but perpendicular to one another.

Here's a photo of the tile sheets laid out on the floor. We chose to use a 1" white porcelain hex tile. The tiles come on mesh sheets that are 10"x12". The glue that holds the tiles to the mesh seems to be water based because the tiles let go when they get really wet. This means that they let go sometimes when being cut on the tile saw. They also let go after they've been sitting in the thin-set for a while (which isn't a problem, just interesting). It's not a good idea to lift up an entire sheet after you've set it in the mortar.

I used a 1/4" V notch trowel to spread the thin-set mortar. It took a little while to get the hang of getting the thin-set to spread at the right thickness. The fact that I was working on top of Ditra moisture barrier made this process a little harder for me that I think it would have been otherwise.

I also didn't use tile spacers because these tiles seems to be 3/32" apart instead of 1/16" or 1/8". They didn't have 3/32" spacers at the store and the tile guy said the 1/8" would work (but they don't). That's okay since I can see 1/32" discrepancies and can make adjustments. One of the perks of being an anal retentive product designer.

Here's a photo of the finished installation. The mortar will set overnight and I'll grout tomorrow. Probably in the afternoon.

Sunday, November 23, 2014

Bathroom Floor - Moisture Barrier

I covered the heating wire with thin-set mortar this morning. The thin-set layer is about an 1/8th inch thick. I laid down a sheet of Ditra on top of the still wet thin-set. The Ditra has a fabric back that gets bonded the the thin-set under it. 

The Ditra does a few things. It's a moisture barrier. It also allows moisture under it to escape because of the waffle structure channels. And it allows the material below and above to expand and contract independently thus reducing cracks in the tiles and grout.


I also added an extra 1/4" thick ring of Hardiboard under the toilet closet flange. This extra detail will bring the flange closer to finish floor level since I have layers for heat and moisture barrier.

I didn't have to install the original full floor layer of Hardiboard since I'm using the Ditra, but I couldn't bring myself to put thin-set directly on my new subfloor.

Saturday, November 22, 2014

Bathroom Floor - Heat

I installed a layer of 1/4" concrete Hardiboard on the bathroom floor and then hot-glued the radiant floor heating wire in place. I also tested the heating system and found that it worked fine. Next I will apply a layer of thin-set mortar and install a layer of Ditra (moisture barrier).

Thursday, November 20, 2014

Address Numbers


I nailed some address numbers on one of the posts at the end of the driveway. I've had the numbers for well over three months. My two-year-old was moderately helpful (he leaned on me the entire time), but that kept him out of traffic at least. I hope the FedEx can find my address this holiday season!

Sunday, November 09, 2014

Vent and Drain Pipe

I installed the sink drain and vent pipe today. I even ran it up through the hole in the roof for the old vent pipe. I think I'll add a little length to it so the exiting pipe is plumb, but it works for now. I also added some blocking in the wall so that I can install the old pedestal sink (we need a sink and I won't get to doing a nice vanity right away).


I also added a brace so that the three-gang box of switches and outlets is stiffer. I didn't like the flex that it had when I plugged into the outlets.


I've pretty much done everything I can do in the bathroom except install the tile floor and drywall. My next steps for the drain pipes is to go under the house and build then new drain lines. And then connect them to the old cast iron system.

I'm also looking forward to installing new insulation in the attic space and in the crawl space for the hall bathroom. That should significantly decrease the heat loss from that room.

Saturday, November 08, 2014

Electrical and Plumbing Progress

I was able to move and connect all of the electrical connections and hot/cold water lines today. I'll be installing the vent pipe and hopefully some of the drain line for the sink and toilet tomorrow.

It's kind of disorienting to not have the outlets and light switches hanging from wires in the middle of the sink alcove. But it's also nice to have all the wires out of the way, too.

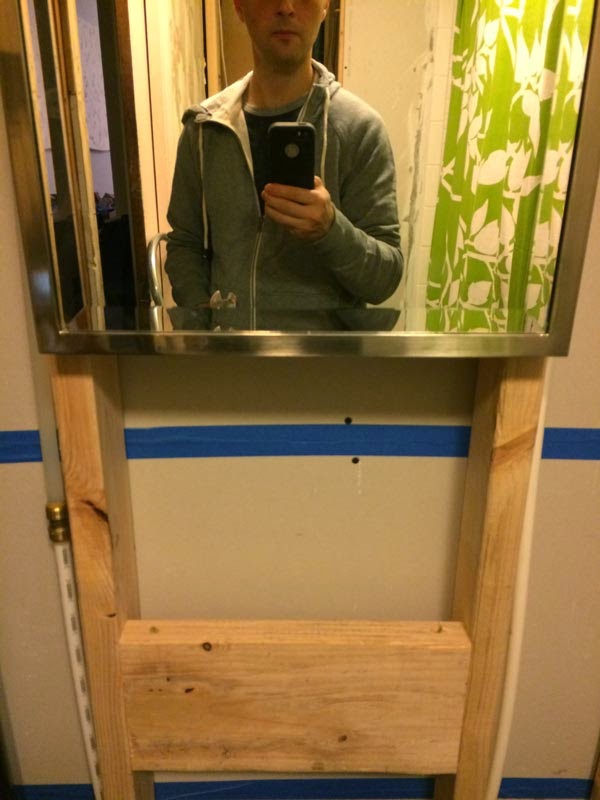
Here's a photo of the sink alcove. You can see the mirror/medicine cabinet, the sconce j-boxes on either side, and the two water lines coming down from the attic space. I'll install the vent pipe and drain tomorrow.

Here are all the electrical connections. There are three switches (for the sconces, the fan, and the light above the shower. There is also a GFCI outlet that feeds the entire run of electrical for the bathroom. In between the switches and GFCI duplex is a night light. Up top is the thermostat location that will control the electrical radiant floor heat. I've run some string in the conduit so I can pull the wires for the radiant heat system and the sensor from the floor up to the thermostat.

Here's a photo of the toilet wall. You can see the new vent pipe (that I still have to connect down below and up above). You can also see the water supply line for the toilet. I've also installed an electrical outlet that can be used for a bidet or other smart toilet accessory (like the Brondell Swash).

You can also see the boxes of 3/4" white hex tile in this last photo.

Monday, October 27, 2014

Love the New Shower

I love the new shower and tub. I'm generally pretty happy with all the decisions we made.

1. I love the controls on the Hansgrohe valve. Having the pressure and the temperature completely separate is nice. And I like the temperature override to prevent scalding. I can turn off this feature, but I suspect I'll leave it on until the kids are older. The shower head had a nice flow, especially after I removed the flow regulating O ring. The Eco-Air spray feels nice and doesn't splatter water all over the shower walls after it bounces off my skin.

2. I really like the tub. I cleaned it today using Bon Ami and a soft nylon brush (as directed by the manufacturer) and it was very easy. I look forward to taking a bath in it someday. It seems to warm of quickly and stay very warm.

3. I like the wall tiles, but I feel like we show have picked a higher quality and larger tile though. 3x6 tiles would have been nicer for suction cups and required less grout overall. I'm happy we went with a non-contrasting grout and tile combination. Everthing blends together and I don't dwell on the natural imperfections of tile installations.

4. I also regret not building in shelving for bottles and soap. My wife nixed the choice of having corner shelves. And I vetoed having inset cubbies/shelves because I was so paranoid of future leaks and water damage. We'll definitely be building inset shelving on the master bath/shower.

If you want to come over and try out the shower, let me know. ~_^

Tuesday, October 21, 2014

Things Learned from this Bathroom Remodel (so far)

I spoke with a friend yesterday about my current bathroom remodel. He had some questions and I thought I'd share some of my answers.

Q: What's the most valuable piece of advice that I got from contractors?
A: Don't buy a bathtub that costs less than $400. We bought an American Standard Americast  steel tub for about $500. It weighs about 160 pounds (a third of the cast iron tub it replaced). We're very happy with it so far.

Q: Will I use a tile contractor for future work?
A: Maybe, but probably not. After watching the install and even doing a little tile install myself, I feel like I could do a pretty good job. Good advice on choosing tile... buy the best tile you can afford. Cheap tile doesn't cut nicely (chipped edge). Buy porcelain instead of ceramic it possible.

Q: Was the contractor happy with the work I did prior to him starting?
A: He was very complimentary on how plumb my walls were (he said he had never worked on walls that were so plumb... only 1/8" off). It made his cuts for the tile in the corners all the same which saved a lot of time. I guess it paid off having spent the extra time reframing the walls.

Q: Where did I buy my valve and trim package for the shower?
A: We bought it all at Aurora Plumbing in Seattle. The folks in the parts department have always been helpful (they removed the flow restrictor in the showerhead for me - I can control flow via the valve) and the sales staff in the showroom (Adele) was particularly helpful in guiding us to the right valves, spouts, etc. We just bought the new toilet for the hall bath from them (a Toto).

Friday, October 17, 2014

A Functioning Shower and Tub

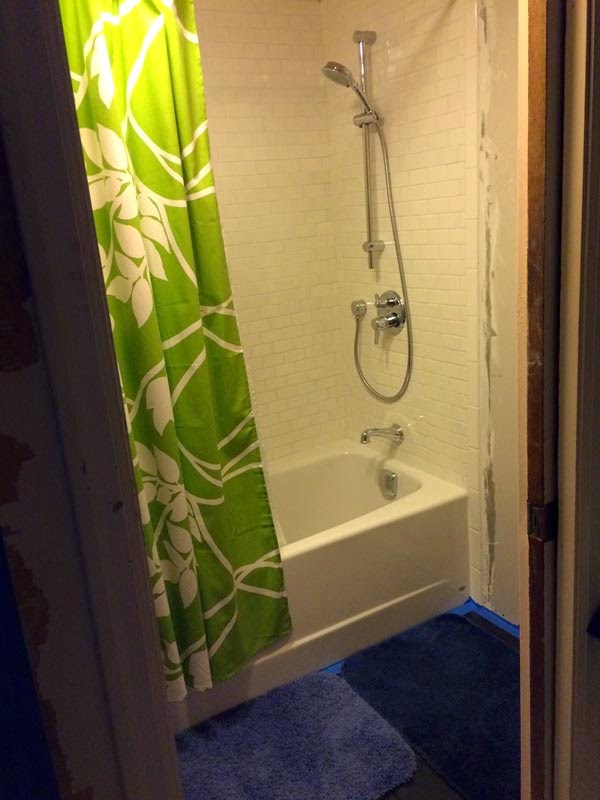
I spent what time I had today installing the valve controls, trim, shower hardware, and spout. I also spent some time cleaning the tub, floor, and covering the big hole in the subfloor where the toilet will eventually sit. The tub was surprisingly easy to clean. Nothing really sticks to it: not tape, not mortar, not grout. Silicone does stick though.

The shower is now functional! I took the first shower and have to admit that it was perhaps the best shower I have ever had in my life! Going almost four weeks without one made this one extra special. My spouse also got to take a shower. She was disappointed in the shower's water pressure. I'll try to address that tomorrow. The shower wand has a flow control in it. Our two kids got to take a bath as well. They had a great time!


I taped plastic on to the floor to provide a little protection should some water find its way out of the shower. The plastic will help keep the subfloor dry and our feet clean. I also hung a new shower curtain that my spouse bought well over a year ago. It looks very nice!