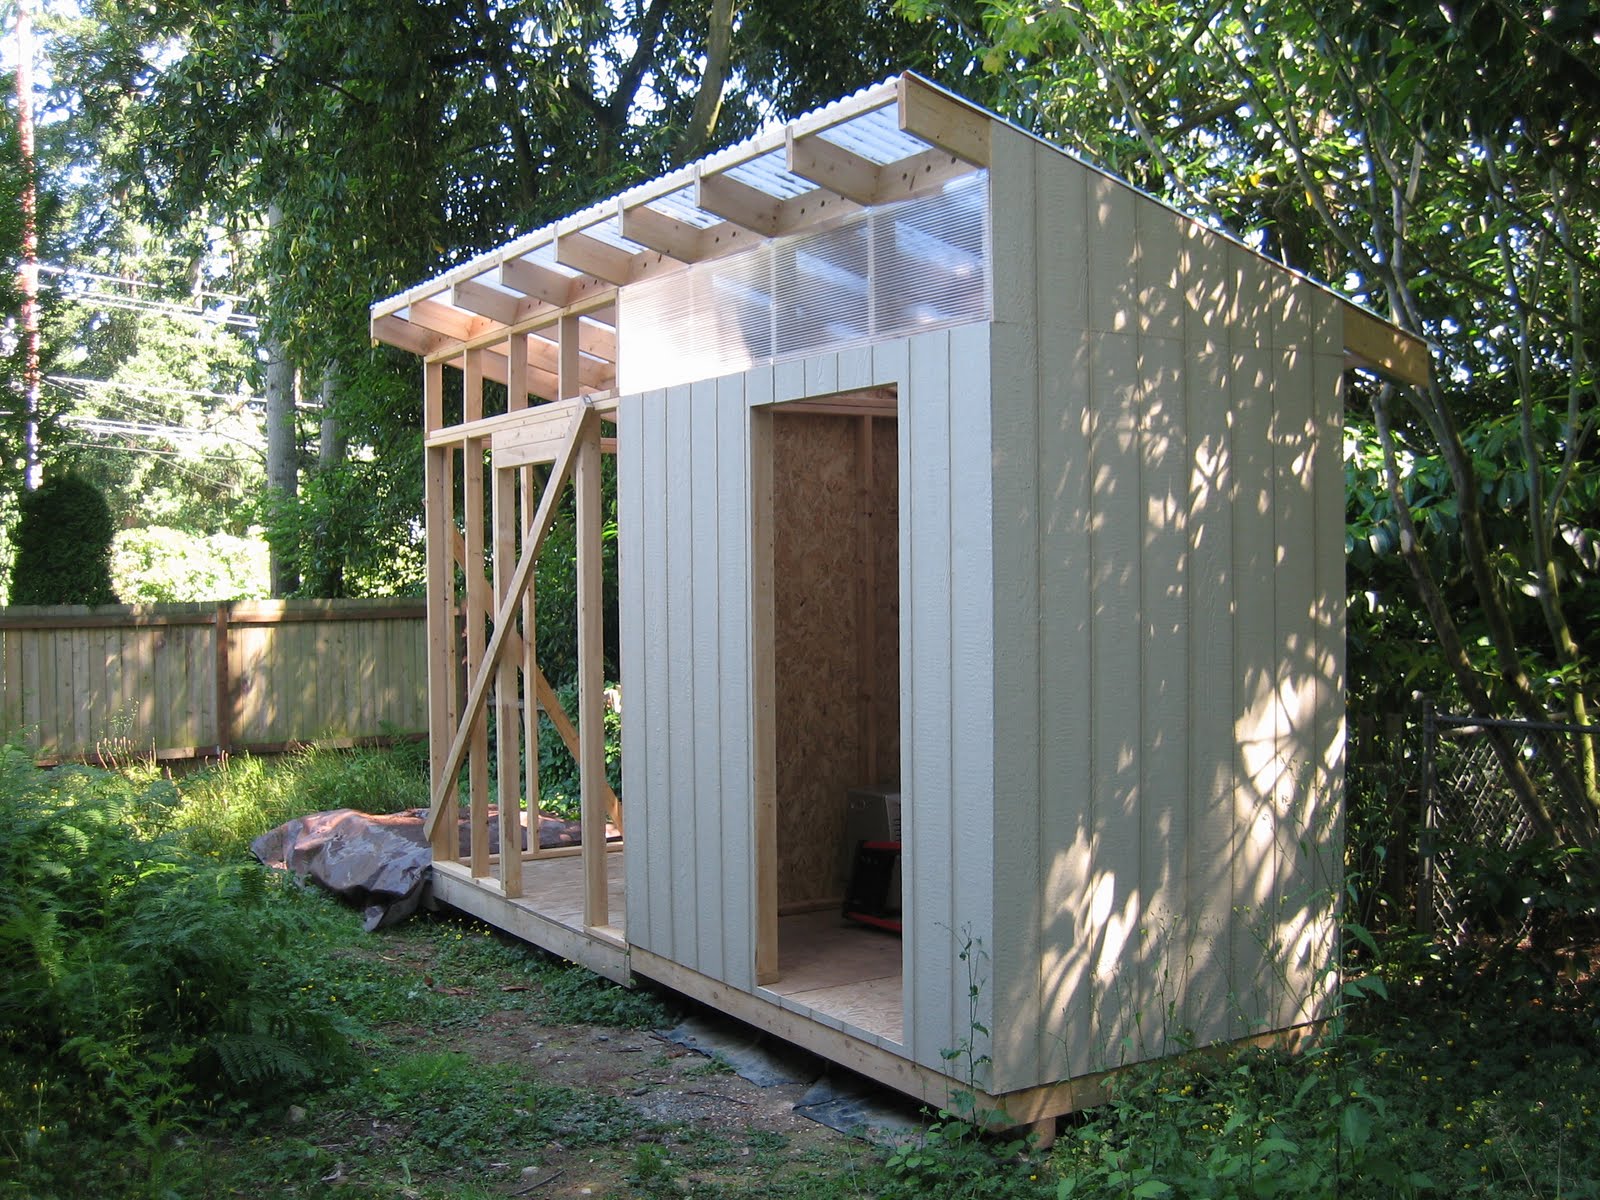
I got a lot done last weekend (and last night). The roof glazing, the siding, and the window are now all done for unit 3. Hooray! My wife and I have also decided to modify the additional sections on either end. We've decided to forgo the hot tub and enclose the west pad for gardening equipment storage (lawnmower, wheelbarrow, etc.). The east section will still be home for the table saw but will now be enclosed. Both the east and west sections will have bi-fold doors.
The color scheme will be the same as the house (blue with white trim, and natural wood for the doors).
The next steps are to paint the north and south sides of the shed and then install the sliding doors. I suspect I can get my two-year-old to help me paint.
The chronicle of the trials, tribulations, and joys of attempting to update a 1930's-era home, affectionately termed "the rat hole" because of its state of disrepair, in Kenmore, Washington.
Tuesday, September 13, 2011
Tuesday, September 06, 2011
Sunday, August 28, 2011
Shed - Part 10: Siding and Window Unit 2
It has unfortunately taken a while to get back the the shed project. I finally got some time yesterday and today to nail on the siding and install the window.
It's really starting to come along. I hope I can get unit 3 done in less time that unit 2 took. And I've decided to build all three units, then paint, then install the trim and the doors. I found a farm supply store locally that has the hardware for the sliding doors I want to built, too.
Wednesday, August 10, 2011
First Blueberries
The blueberries are beginning to get ripe. Very slowly. The two-year-old has discovered them and has be gently led away since he'll eat the green ones, too. It's very satisfying to see the berries change color since the summer has been so cool and cloudy. We'd thought they'd never get ripe!
Thursday, July 28, 2011
No More Trailer
Notice anything different in the above photo? No trailer! Just sold it today. And, unfortunately, for less than we paid. A lot less. I am not a trailer expert. And I didn't have a lot of time to shop around and learn before making the trailer purchase last October. And while I think I got the best trailer available at the time and for our needs, it had some water damage and leaks that I didn't know about or understand.
I found a buyer that understood the issues and was willing to fix them so I can sleep at night knowing I didn't screw someone over. And now the end of the driveway is empty. Yay!
Monday, July 25, 2011
Shed - Part 9: Rafter Framing and Glazing Unit 2
I finished up the rafter framing and roof glazing on unit 2 this last weekend. Nothing really new or different to report. I did take advantage of the fact that the glazing is a little expandable to accommodate some of the creep that was showing up on the back side in the rafters. I was able add 3/8" to the run of 8 feet which was nice because now unit 3 can start from zero instead of being in the hole.
Monday, June 20, 2011
Shed - Part 8: Wall Framing Unit 2
I got the framing itch yesterday and today. And now the walls are framed for shed unit 2. I'm still shopping for the hardware for the sliding doors so I can't really proceed on unit 1. Well... I guess I could start building the shelving in unit 1.
Never-the-less... I framed the walls. I'm learning a few things as I go. Like... make the front perfect and let the back side absorb the errors in tolerances. And unit 2 is approximately 3.5" taller than unit 1. Since the doors will be the same size, that means that the header for the doorway is bigger.
Framing for unit 2 seemed to go more quickly. That's partially because I only framed three walls (the fourth was essentially already built). All the 2x4's are assembled using nails, but I'm using screws when attaching the walls together. I'm also using screws along with nails when attaching walls to the floor.
Never-the-less... I framed the walls. I'm learning a few things as I go. Like... make the front perfect and let the back side absorb the errors in tolerances. And unit 2 is approximately 3.5" taller than unit 1. Since the doors will be the same size, that means that the header for the doorway is bigger.
Framing for unit 2 seemed to go more quickly. That's partially because I only framed three walls (the fourth was essentially already built). All the 2x4's are assembled using nails, but I'm using screws when attaching the walls together. I'm also using screws along with nails when attaching walls to the floor.
Monday, June 13, 2011
Shed - Part 7: Window
Installing the north facing window on the shed this weekend was the easiest part about the shed so far. I used Sunlite which is a clear twin-wall polycarbonate. It comes in 24"x96" panels and is 8mm thick (which is just under 3/8" which is the thickness of the siding). I'll be putting on trim around the window and along the corners of shed someday.
I used screws to attach the glazing to the shed. I cut little squares out of the top layer of the glazing so that the head of the screw was below the surface. Then I put a little piece of tape over the hole. You eventually won't see the tape or screws when the trim is on. I also taped the ends of the glazing panel. The tape will minimize condensation in the hollow glazing.
The sliding door comes next.
I used screws to attach the glazing to the shed. I cut little squares out of the top layer of the glazing so that the head of the screw was below the surface. Then I put a little piece of tape over the hole. You eventually won't see the tape or screws when the trim is on. I also taped the ends of the glazing panel. The tape will minimize condensation in the hollow glazing.
The sliding door comes next.
Monday, June 06, 2011
Shed - Part 6: Siding
I finished installing the siding on the first shed unit this weekend. I used a preprimed 3/8" thick OSB siding panel. Now that the siding is on, the shed is very stiff and doesn't rack at all. The interior is very well illuminated because of the translucent roof, but I am going to install windows the north wall above the doorway any way. I think it will look better and it will guarantee some additional light even in the winter or if the pine needle built up on the roof gets too thick.
I may start framing the next unit now since I'm still exploring ways to do the sliding door and the windows. We'll see. The weather is so nice right now that I may be able to crank through the next two units pretty quickly. Especially since my brother is moving to town and my brother-in-law will be in town for a little while, too. One of us will play with my son while the other builds the shed.
I should install shelving and peg board next. That way I can move stuff into the shed right away and clear out the entryway in the house.
I may start framing the next unit now since I'm still exploring ways to do the sliding door and the windows. We'll see. The weather is so nice right now that I may be able to crank through the next two units pretty quickly. Especially since my brother is moving to town and my brother-in-law will be in town for a little while, too. One of us will play with my son while the other builds the shed.
I should install shelving and peg board next. That way I can move stuff into the shed right away and clear out the entryway in the house.
Sunday, May 22, 2011
Shed - Part 5: Roof
I installed the last of the roof panels today on the first section of the shed. I used Suntuf corrugated polycarbonate panels. The kind I chose were opal white with a light transmission of 45%. They also block 99.9% of UV light.
I added some additional lumber to that rafter assembly so that I could install the panels according to the manufacturer's recommendations. You can see in the photos below that I added some 2x2's along the front and the back as well as some 2x4's along the middle.
The 2x2's along the front and back are the most critical. They'll keep the panels flat and help resist the attempts that the wind will make to remove the panels. I'll be installing some fascia along the front and back so the 2x2's won't really be all that visible when the shed is done.
I added some additional lumber to that rafter assembly so that I could install the panels according to the manufacturer's recommendations. You can see in the photos below that I added some 2x2's along the front and the back as well as some 2x4's along the middle.
The 2x2's along the front and back are the most critical. They'll keep the panels flat and help resist the attempts that the wind will make to remove the panels. I'll be installing some fascia along the front and back so the 2x2's won't really be all that visible when the shed is done.
Monday, May 09, 2011
Shed - Part 4: Roof Framing
Well, I finally got the rafters installed. I notched the rafters along the top, but I left the lower end unnotched. Here's a photo of the first rafter in place while I traced the notch.
Here are a couple of process photos.


The rafter blocking has screened holes for cross-breeze ventilation. This completes the framing. The next step is to install the roof panels. Then I'll tackle the sheathing, the window, and the door.
Here are a couple of process photos.

The rafters overhang the front by one foot. They overhang the back by two feet. I'll be storing ladders and various yard tools on the back so the extra overhang will provide additional protection. I used brackets called hurricane ties on each of the rafters to connect it to the walls. At least the rafters will stay connected to the walls in a wind storm even if the roof panels get pulled off.


The rafter blocking has screened holes for cross-breeze ventilation. This completes the framing. The next step is to install the roof panels. Then I'll tackle the sheathing, the window, and the door.
Wednesday, May 04, 2011
Flowers in the Yard - 2011
The violets that my spouse brought from her childhood home bloomed wonderfully this year. She says their fragrance isn't as strong though. I wonder if it's because of the lack of sunlight.
The tulip in the fifty-five gallon plastic drum container came up this year. I think this is only the second time it's bloomed since we've been in the rat-hole.
Here's a photo of one of the daffodils that comes up every year.
And here are a couple of photos of the most common flower in the yard.
The tulip in the fifty-five gallon plastic drum container came up this year. I think this is only the second time it's bloomed since we've been in the rat-hole.
Here's a photo of one of the daffodils that comes up every year.
And here are a couple of photos of the most common flower in the yard.
Subscribe to:
Posts (Atom)