Sunday, May 06, 2012

2nd Bedroom - Part 4: Electrical

I finished off the electrical today. I ran wire from the service panel to the second bedroom for one new 20 amp circuit for the lights at the six outlets as well as a new line for the 240 volt baseboard heater.  All of the old wiring is in such bad shape that when you touch it the wire casing disintegrates off of the wire.  I removed both old outlets (both were ungrounded).

The north wall is where I came down with the wires to the thermostat, the light switch, and the first outlet.  The top box (at 60" high) is the thermostat.  The middle box (at 48" high) is the light switch.  The bottom box (at 15" high) is the first outlet.  The first outlet is a GFCI since one of the outlets is going to be on a "wet-wall."  The light and light switch were the first things I wired since, well, I needed light.  I'd cut the old light switch wires when I moved the doorway.  And i let the two-year-old flip the switch for its first time on.  He was very excited!

North Wall

The old light didn't have a J-box, just two holes in the drywall.  There's a 2x4 above the ceiling for the fixture to screw into.
Old light location

I cut a new hole in the ceiling (so that the new light will be centered in the room now that part of the room is being absorbed into future bathroom and closet space).  I installed a new J-box, too.
New light location

I'm not rolling over and over about the new light.  But it's nice enough.  And we can swap it out at any time in the future.  I'd like to put cans in, but a dome light is more efficient since it spreads the light.  I think the two-year-old will appreciate the extra light when he's playing in his room on gray winter days.
New light

The east wall has two outlets.  It also has an empty J-box for future phone/data.  I ran a length of 3/4" conduit up to the attic space (with a cork in it to seal it) so that I can get to it any time.  I wonder if I'll ever use it?  The box will get a blank cover after the drywall is installed.
 East Wall

The south wall has two outlets as well (one on either side of the window).  The baseboard heater gets installed under the window and outlets aren't allowed to be over the heater.
South Wall

The west wall has only one outlet.  This wall will eventually have a bathtub on the other side of it.  I considered putting in another outlet on the right side of the closet, but the new door will cover that section of wall when open so it didn't make much sense.
West Wall

I've already brought both the wall insulation and gypsum board into the room.  Now all I need is the time to install them.  Having the last nine days available to concentrate solely on the demo, framing, and electrical has been great.  And my spouse really enjoyed her week off of work to play with the two-year-old.  Hopefully I can grab a few moments here and there to finish up.

2nd Bedroom - Part 3: More Framing

 The east wall was pretty easy to reframe.  I just popped out the old window, framed it in, and then installed some 3/4" plywood sheathing on the outside.  I was really lucky because the hole to fill was 48" wide (the width of the plywood) so that's one less cut to have to do.  I also cut some sheathing for the spot on the south wall that needed it.  By the way, I had to do all of the wood cutting in the rain.  At least it wasn't cold.  Sawdust is kind of funny in the rain.  Instead of making a dusty cloud, it makes a sticky sludge on your wood.


 The north wall was the trickiest wall to reframe.  This is mainly because I wanted to save the door so I could control access and minimize debris going out into our living space.  I'm not reusing the door in the long term for the room, just until the new door arrives.  I pinned up a sheet to contain the sawdust when I was using the reciprocating saw to cut the plywood and the nails holding in the door frame.  I screwed up some old drywall scrap on the outside of the room to close off the remainder of the wall and then framed in the old closet doorway.

The inside of the room had gypsum board.  The outside of the room had 1/4" plywood covered in wallpaper (three layers, and painted burlap).  Here's a photo of what I found on the back of one of the plywood.

Here's a photo of all the finished framing on both the north and east walls.

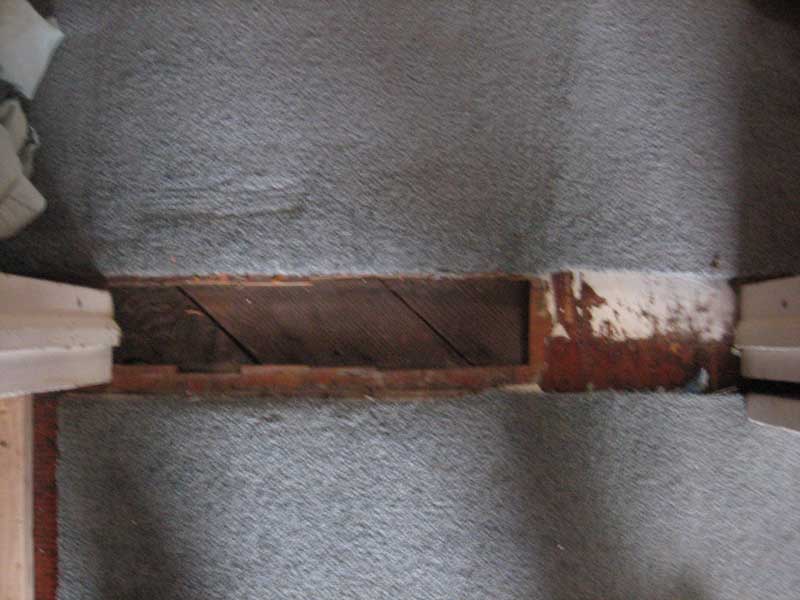
There's a small area in the new doorway that's going to need flooring.  I cut out the flooring in the old closet doorway with my Dremel Multi-Max and will save it for when I get around to doing flooring work.

 During all of this reframing work, I also made a trip to get some insulation for the room.  I love the bungee spiderweb that we have for holding loads together.  It was perfect for the insulation load.

Now that all the framing is done, I get get to run new wire for all the outlets, lights, and baseboard heater.

Wednesday, May 02, 2012

2nd Bedroom - Part 2: Framing

Now that the second bedroom is cleared out it's time to get to work!  The weather cooperated and didn't rain on me while I transported the materials.  Remember the 780 pounds of gypsum board I removed?  Well, I bought 670 pounds of new gypsum board to take its place.  Thank goodness for Ultralight Sheetrock.  It's the new standard and weighs 30% less and is stronger than the old stuff.  Still... carrying all that weight was not friendly to my back. (A hot shower, some time on the BodyBridge, and some ice packs made it happy again.)

The first work I did was to frame the new wall and closet space.  The spaces on either side of the closet are for future expansions of the bathrooms (they're so small!).  Since these walls are not load bearing I only used a single 2x4 on the top.  I spaced the studs so that I don't have to cut the wall board (width) and can just screw it in place.

Reframing the window was a bit of deja vu.  It was just like when I reframed the window in the kitchen nook.  There's a little sheathing that needs to be installed, but I'll do that tomorrow when I take out the other window and put sheathing in its place.  And have I mentioned that I love my reciprocating saw?  It is a tool no remodeler should be without.  I call it my light saber since it cuts through anything (very handy when cutting holes in walls).

The new window is going to be so nice!  It will let in a lot of light, which is a good thing since the other window is going away (a future room addition means the other window needs to be a wall).

I attack the east wall and the interior north wall tomorrow.  The north wall will be tricky since I want to maintain some access control to minimize toddler exploration.

Monday, April 30, 2012

2nd Bedroom - Part 1: Demolition

Saturday marked the first day of a week long push working on the second bedroom. Day one was all about demolition. I popped out one of the windows and pulled off all of the gypsum board from the walls. I left the ceiling intact since it's in okay shape and hanging gypsum board on ceilings sucks and I don't want to do it if I don't have to.

Here are a couple of stitched panoramas of the room before I started.  We've be using the room primarily for storage and the occasional guest.  The shed allowed us to empty it (but it was hard to keep the two-year-old from moving right in).

I was very curious what I'd find in the walls.  Would there be any insulation?  Dead rats?  A bag of silver dollars?  Here are a couple more photos of the room minus the wall board.

So... what was found?  Well, no insulation.  Not surprising considering the mold growth on the walls.  Also, no headers above either of the windows.  I guess the walls were built either before headers had been invented or the people who built the walls didn't believe in headers.  I did find a dead rat.  It had been dead for a long, long time.  Another thing I found (and I expected it) was a opossum den under the bathtub (which was revealed since wall board doesn't typically get run below the bathtub.  There was some water damage in that area, too.  But nothing so horrible that it made me cry.  And believe me, this house has made me cry in the past.

I loaded 780 pounds of gypsum board into the truck and went to the transfer station to dump it before it absorbed any rain.

I'm framing a new wall to accommodate some future bathroom expansions and a new closet for the second bedroom.  When I pulled up the carpet and old vinyl tile in this area... wow!  I was very surprised to find a beautiful old wood floor!  I looks like fir.  And it really is gorgeous.  We're going to keep it and try to rehab it (lots of sanding and then either oil or polyurethane).  I think the wood floor runs into the hallway, too.  So excited!

Sunday, April 29, 2012

More Flowers

The lone tulip that comes up every year.


Here's a blossom of a lipstick strawberry.  They are most flavorful that the Tristar Everbearing ones we have.  But they don't produce as many strawberries.

Here's a photo of the most common flower in the backyard right now.

And there is still a daffodil holding on.

They're not flowering, but here's a photo of the blueberries budding out.

Monday, April 02, 2012

Spring Flowers 2012

A crocus and and miniature daffodil come up!


And the big white daffodils are being eaten from the inside by slugs! You have to love the Pacific Northwest!


Wednesday, January 18, 2012

Shed in the Snow

We're having a few back to back snow storms here in the Puget Sound area. The shed looks good in the snow!

Saturday, January 07, 2012

E-Waste Disposal

So... my spouse and I have accumulated a fair amount of stuff that has become e-waste. Old CD-Rs, DVD-Rs, VHS tapes, Zip disks, 3.25" floppies, Jazz disks, cables, etc. There's just no point in keeping this stuff. But what should we do with it? Toss it in the landfill? There aren't many options.

One option is to recycle it. It costs some money, but it's not that much and it's definitely worth it. We decided to use GreenDisk.


They have an option where we can ship 25 pounds of e-waste to a GreenDisk certified processing facility where all the material broken down and recycled in the USA. We pay the shipping and the processing fee is ten dollars. We filled three twenty-five pound boxes.

And now the e-waste in not in our house or our shed!

Tuesday, January 03, 2012

Shed in Action

There have been requests to see stuff in the shed. Here are photos of units 3 and 2 with stuff in them. Unit 3 has stuff that was in the storage unit. We'll be doing a purge on unit 3 soon. Unit 2 has stuff that has been reboxed and was formerly in the second bedroom.

Monday, January 02, 2012

Shed - Part 18: Fascia

I finally got the fascia and the drip cap on the front of the shed.

Friday, November 25, 2011

Shed - Part 17: Shelves

I built the shelves in units 2 and 3 instead of going shopping on Black Friday. Time well spent. I framed the shelves using 2x4's and 2x2's and used the left over siding for the surfaces.


These two units are going to be primarily filled with boxes. There will also be an unused futon and other random larger stuff. I'll be emptying the storage unit tomorrow or the next day so the shed will be able to start paying for itself!